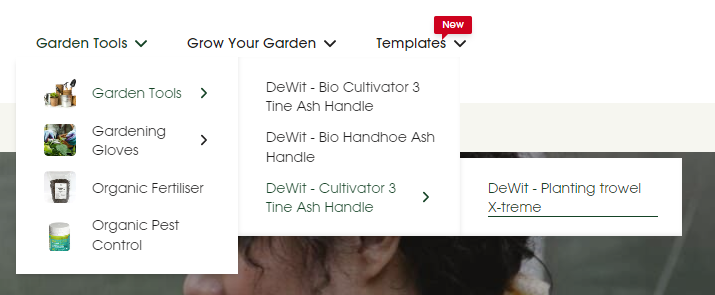
1. Set up Navigation in Shopify Admin
- In Shopify admin, go to Content > Menus.
- Click on an existing menu or select Add menu to create a new one.
- Fill in the Title box to give your menu a name (This title won’t show up on site)
- To add a menu item, click Add menu item, enter its name, and assign a link (e.g., page, collection, product, or URL).
- To create a nested menu, click Add menu item again, then drag it under another item by holding the dot icon.
- Click Save.

If you need more detailed guidance, look back at the guide about How to organize menu items in Shopify admin.
2. Assign the menu
|
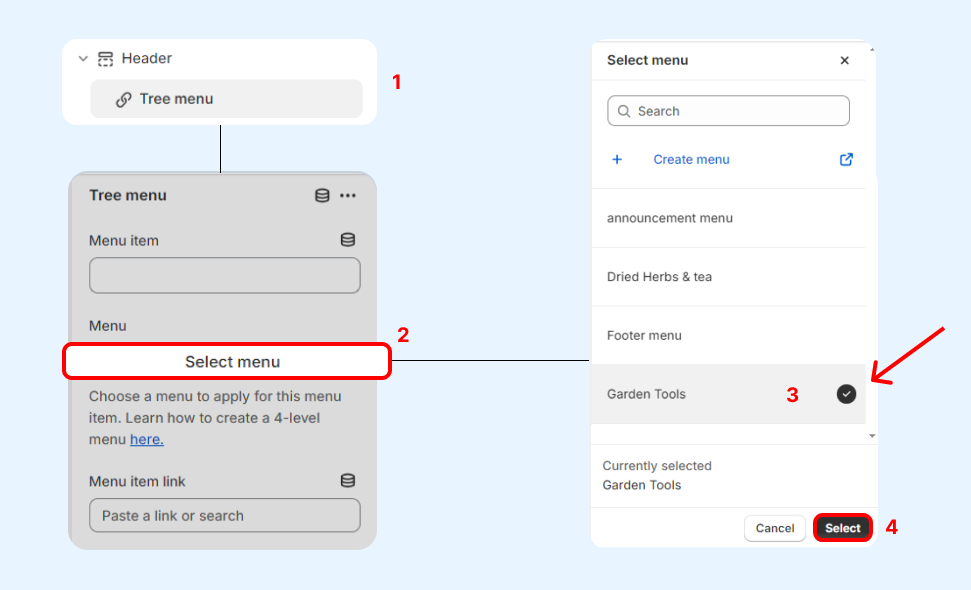
📌 Important step: Give the main menu a title: In Theme Editor, click on Header section > Tree menu block > Enter the menu title in the Menu Item field on the right panel. ⚠️ You must enter this field for your menu to appear on site.  |
Step 1: Go to Online Store > Themes > Customize.
Step 2: In the Theme Editor, under Header, find the Header section
Step 3: Click Add block, then tap on the Tree menu.
Step 4: On the newly appeared panel, click on Select menu → Find and choose the menu you created → Tap Select.

|
Note: Now that you have changed your title, the name of the block will be changed to your new menu title.  |
3. Customize the look of the Tree menu
📌 To attach a link for the main menu:
In Theme Editor > Header > Tree menu block > Click to choose or enter a link in the Menu item link field.
(Optional) Check the box to open the link in the new tab.

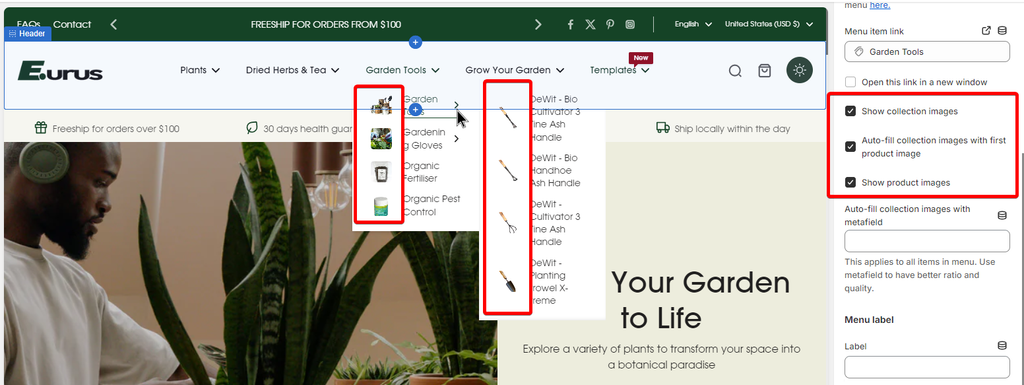
📌 To show images for menu items:
- In the Theme Editor, go to Header > Tree menu Block.
- On the right panel, you can:
For menu items linking to a COLLECTION:
- Check "Show collection images" to display featured images (see this guide from Shopify for adding/changing collection images).
- Check "Auto-fill collection images with first product image" to use the first product image instead. (⚠️ This only works if 'Show collection images' is enabled.)
For menu items linking to a PRODUCT:
- Check "Show product images" to display the product image on the menu.

|
Note: This feature only works with the menu items that link to a collection or a product. |
📌 To add a label on the menu:
In the Theme Editor, go to Header > Tree menu Block > Scroll down and find the Label section on the pop-up right panel. From here, you can:
- Enter the text you want to show on the label.
- Adjust the Label position to be Above or Aside the main menu text.
- Change the text & label color.
- Add an icon:
- Choose from the drop-down list
- Find an icon from Eurus’s icon library, copy and enter its name into Use another icon.
- enter the custom icon SVG code.
Leave everything blank to remove the label.

