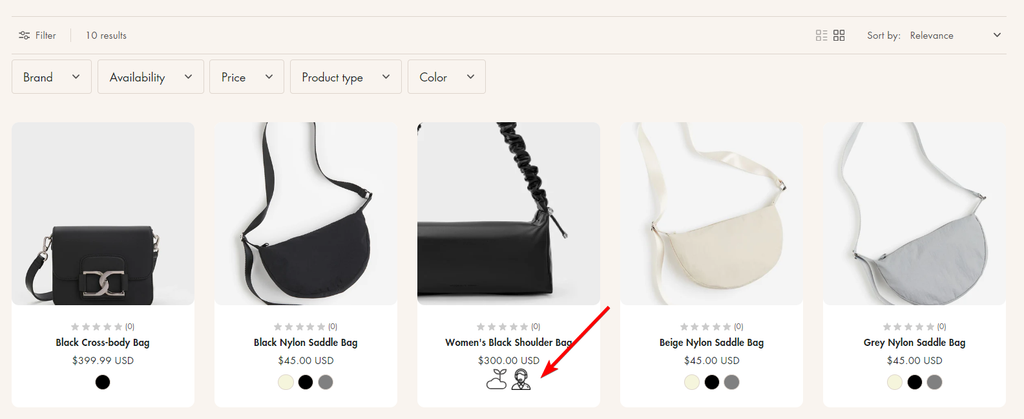
This feature allows you to display up to 4 icons beneath each product card, making product highlights easy to spot.
1. How to show icons at the bottom of product cards:
a) Method 1: Using icons from Eurus' icon library
To use the icon from Eurus list, follow these steps:
Step 1:
Create a product metafield:
- Go to Settings > Metafields and metaobjects > Products > Add definition.
- Name the metafield (e.g., "icon from list").
- (❗ Important) Set the Type as Single line text - One value.
👉 Refer to this guidance about “How to create Product metafields” for a detailed explanation.
Step 2:
In Shopify admin, Go to Products > Select a product > Scroll to Product Metafields > Click the metafield you just created (e.g., “icon in list”).
Step 3:
Choose an icon from Eurus' icon library, copy its name, and paste it as the value for the metafield.

Step 4:
Go to Online Store > Themes > Click Customize.
Step 5:
In Theme Settings > Product, scroll to Highlighted Icons. There are 4 sections for 4 icons.
Fill in the Icon metafield by pasting the metafield’s Namespace and Key.

|
Note:
|
Step 6: Click Save.
b) Method 2: Uploading custom icons
To use your own images as icons, follow these steps:
Step 1:
Create a new product metafield.
- Go to Settings > Metafields and metaobjects > Products > Add definition.
- Name the metafield (e.g., "custom icon").
- Set the Type as File.
- Save the metafield.
👉 Refer to this guidance about “How to create Product metafields” for a detailed explanation.
Step 2:
Go to Products > Choose a product > Scroll to Product Metafields.
- Click the metafield you just created (e.g., "custom icon").
- Upload your custom image file.
Step 3:
Go to Online Store > Themes > Click Customize.
Step 4:
In Theme Settings > Product, scroll to Highlighted attributes.
In each of the 4 icon sections, enter the Namespace and Key of the metafield you created into the Icon metafield.

Now your custom image will display as an icon under the product card.
|
Note: If you enter the same Namespace and Key in multiple Icon metafield fields, the icon will only appear once |
Step 5: Click Save.
2. Choosing Which Sections to Show Highlighted Icons
By default, highlighted icons appear on all product cards in the following sections:
- Recommendation Product
- Featured Collections
- Cart Upsell
- Collection Page
- Search Page
- Recently Viewed
- Collage
- Shop the Look
✍️ If you want to hide the icons in specific sections, then:
- Navigate to the Theme Editor
- Go to the section where you want to disable them (only the sections listed above).
- Turn off the "Show highlighted attributes" setting.
3. How to add tooltips for icons on Product Cards
|
💡 Tooltips are small text boxes that appear when customers hover over the icons at the bottom of the product card.
|
Before setting up tooltips, make sure you've already added icons following the steps in Part 1: How to show icons on product cards.
Step 1:
Create a new product metafield.
- Go to Settings > Metafields and metaobjects > Products > Add definition.
- Name this metafield (e.g., "icon label").
- Set the Type as Single line text.
- Save the metafield.
👉 Refer to this guidance about “How to create Product metafields” for a detailed explanation.
Step 2:
Go to Products > Choose a product > Scroll to Product Metafields.
- Click the metafield you just created (e.g., "icon label”).
- Enter the tooltip text you want to display (this is what customers will see when they hover over the icon).
Step 3:
Go to Online Store > Themes > Click Customize.
Step 4:
In Theme Settings > Product, scroll to Highlighted attributes.
Step 5:
Paste the Namespace and Key of the metafield you just created into the Label Metafield field.

|
Note: You can use one label metafield for multiple icons by pasting the same Namespace and key in different Label metafield boxes. |
Step 6: Click Save.

